In celebration of Valentine’s Day 2020 I’m spreading my love for production (and more) with a list of favorites in which fellow producers, models, and anyone really, can refer to. So, if you’ve ever been curious about my equipment, software, products, resources, recommendations, tips, and more, then you can find it here! Enjoy!
Favorite Equipment
4K Video Camera: The Sony A7r III. The first time I ever saw footage from this camera was many years ago during a couple’s cam show and I was blown away by the visual quality their setup provided. The video footage looks great from everything I’ve seen on YT as well. However, I don’t use one myself since I already have a vast collection of Canon lenses, so it’d be expensive to switch to Sony and using a lens adapter would risk focusing issues. Also, the setup of adding on a video recorder for self shooting in lack of a complete flip screen turned me off. It does capture a nice high quality video all around though and so I wanted to mention it for those who it would find it suitable.
You may want to compare it to the newer version – the Sony A7r IV – as well as new cameras that come out after the date of this post. I didn’t recommend the IV first because from the comparison footage I saw they both look equally great for shooting video, and overall people aren’t impressed with the upgrade when it comes down to shooting video with it. This sums it up. (Photos are even better, videos are about the same) It may be worth waiting for the V if you’re not in a hurry to buy now. (Not to mention that the camera industry is soaring – a lot more amazing camcorders and cameras will be coming out in the years to come and in all shapes/types/sizes!)
If you’re wondering what cameras I’ve used because you’ve liked my quality, even though they’ve gotten me to where I am today, there was honestly always something I wished each one was different/better at, so I don’t find them worth mentioning. Most of my videos are heavily color graded too fyi. (Perhaps I’ll do an editing tips blog post sometime) I’m picky. Super picky. Most of you are probably still perfectly fine with shooting in Full HD which opens up so many options instead of narrowing it down to 4K…
In my opinion 4K porn is currently quite a bit overrated. Video producers, don’t worry if you cant afford a 4K camera right now, wait a few years and they’ll be even better or cheaper and customers will have devices more powerful for enjoying it. Current day it’s mostly just for trying to prepare for the long term future and for people who watch videos on big 4K screens. Going 4K is more for a producer’s advertisement benefit, since customers will take interest when they see the words “new camera” and “4K” etc.
When it comes to customers viewing your porn on their cell phone, laptop, computer screen… they probably won’t even notice much of a difference, if any at all, between a 4K version of a video and the Full HD version of that same video if the producer used the proper export settings as not to lose any detail in one or the other. You will see the difference between Full HD, 4K, and above, on a big screen TV and in theaters. In that case, you want the largest resolution you can get.
Also, FYI, offering multiple resolutions is recommended for viewer device compatibility. Many use cell phones which makes 4K absolutely pointless and just a f-n space hog on the customer’s device, and a surprising percentage still use devices that can’t even play 4K smoothly. (I’m curious what the results will be several years down the line though.) If you’re shooting in 4K you’ll need a memory card with the proper read/write speed for 4K video, more memory card space and hard drive space for the larger files, and you may end up needing a more powerful editing machine too. So, the camera itself isn’t only more expensive- the entire setup is.
If you’re on a smaller budget than what the above would cost (plus accessories for it) then I’d just wait until 4K becomes more of a standard in the industry, and look for a camcorder or dslr with great autofocus (which Sony and Canon are known for) and has a good return policy in case you don’t like it. If you’re comparing cameras, look into the bit depths as well. If you’re just starting to make Size Fetish content then a GoPro would be great for size difference pov because of the wide angle, and these little cameras have come so far, they’re actually really good in my book. Plus there’s a ton of reviews and tutorials for them on YouTube. And I’d pick up at least one light (probably the Diva ring light below or something bi-color) or use as much natural light as possible- a well lit shot is important for good video quality.
Some cell phone videos are even pretty darn good now days so if you just want to get started you don’t need any super expensive equipment right from the get go to become as successful as well known fetish producers, just give yourself time to learn and grow. I mean, we all started somewhere. Upgrades can always happen later. I started with an ancient cassette video camera, a table lamp, dollar store props, and I ate lots of ramen and dollar menu food. The important thing is to just get going and put lots of creativity into your videos as they are an expression of yourself. Getting started could be a whole other blog topic too- but I just wanted to quick mention that in this one. It is spreading my love for production after all.  Also, this video is from 2015, but it really inspired me when I first found it, so here’s a share!
VR Camera: Theta V and GoPro Fusion. (use to date of writing this blog post) I got the GoPro Max a few months ago too, but I haven’t used it yet. I’m sure it’s great, as all of the recent GoPro cams are.
Sports Camera: GoPro 6 Black (use to date) or newer. Honestly GoPro comes out with a new camera every year, but I have to say I’m actually completely happy with the options and video quality of the 6 Black. I don’t plan on considering “upgrading” until the 9 Black comes out or even later. I’ve watched lots of reviews to consider upgrading sooner, but people who complain about grain aren’t utilizing the ISO limit in the menu options. There’s almost zero grain in my GoPro shots, even a night-time themed shot as seen in the POV shots mixed into the end of this video. If you’re actually using it for sports or even just walking around a lot throughout shots then I’d recommend grabbing a newer one for the hypersmooth stabilization. My shots mostly have soft movements and are pretty still, so it’s a pointless upgrade for me personally at the moment.
Lights: Litepanels Astra Bi-Color LED Panel and Diva Ring Light (I just wish it was bi-color) If you’re looking for something cheaper then at least go for a bi-color light. That way you have the option to use fluorescent if your set has a lot of natural light or Tungsten if it’s dark outside and you have a lot of indoor lights on like ceiling lights and floor/table lamps. (If you have your own studio, consider getting Phillips Hue White & Color Ambiance bulbs for your indoor lights!) It’s important to keep your light color temps matched up and also another perk of LED panels is they stay pretty cool! It’s also worth getting a large reflector. I find them very handy for fill light or tossing underfoot/body. (I cover more on this later) Also, look for lights with high CRI ratings.
Mini light: QIAYA Selfie Ring Light I just love this little light so much that I got one more so that I always have one that’s charged when I shoot! I clip it to my laptop during cam shows and sometimes to the lcd screen of one of my cameras when I’m doing a handheld shot. Or I toss it on the floor and diffuse it with a white shirt for under body shots (feet, booty, whatever)! It’s just perfect. And cheap. Love it. $13 steal. Has three brightness settings. The only kinda down side is it’s not bi-color, it’s more on the Fluorescent side. Gotta say tho, I still recommend it 100% for these purposes. However, I don’t really like how it looks for cell phone selfies FYI. I just go to the nearest window or turn on one of my filming lights for those.
Graphics card: NVIDIA GeForce GTX 1080 Ti Got it a few years ago and it nearly cut my render time IN HALF!! Might be something even newer/better, but I’m completely happy with mine! I don’t know why, but the price appears to have gone UP since I purchased mine for $780, so you may want to just keep a watch on the price for a while if you want to buy it to get a good deal.
Shrunken people / props: I figured I should include this because I can’t even tell you how many times I’ve been asked where I get them. I get them from Amazon – just search for scale model person or replace person with whatever you’re looking for. Sometimes you can find them at hobby/train stores as well! There’s many scales (sizes) and brands to choose from, just gotta look around. I don’t have a favorite shrunken person prop. They actually just make me wish I had real shrunken people that much more lol!
Favorite Softwares and POST Production Resources
Edit: Adobe Creative Cloud – I use Premiere to edit videos and take screenshots, Audition to enhance audio, Photoshop to make .gifs and photos, Bridge for batch rename photo sets, After Effects for everything from fx and more, Light Room to edit RAW photo sets, and more. Subscription comes with a ton of programs for your editing needs.
Clean up video noise: Neat Video (Premiere CC Plugin)
Smooth skin: Cosmo
Color correct/grade: Magic Bullet Looks
Stock videos, sound fx, and more:Video Blocks
Stock images: Adobe Stock
Royalty free music: Shockwave Sound
Fonts: DaFont
Office Suite: OpenOffice I use this for docs & spreadsheets on my computer and laptop when I don’t want to do so online with Google Docs and Sheets.
Filming Tips / How to get the Shot / How to get in the Industry
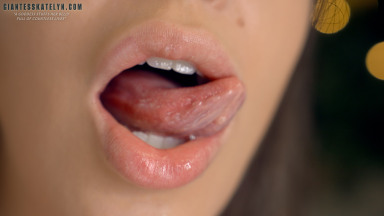
Show the uvula – Open mouth as much as possible, lower back of tongue, and most importantly smile really big! This technique allows more light in, shows more teeth, and opens up a viewing space back to the uvula. I’ve taught every model to do this since the very first one I hired and it’s worked every time. (I’ve even told producers I’ve worked with who asked how I get my mouth shots – I’m an open book! ~.^)
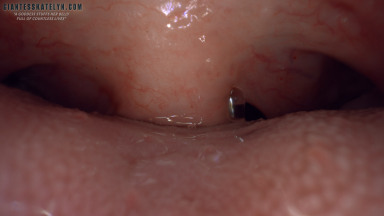
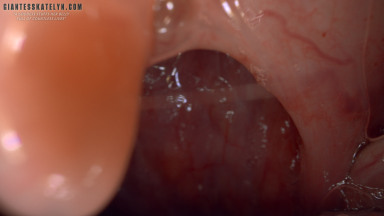
Get deep inside the mouth: Look up “Endoscope Camera” — I don’t have one in particular to recommend, I’ve been through a bunch and they all seem to produce similar low quality video, so heavy POST work is needed to clean it up and enhance it. All of my endoscopic shots are heavily edited. The on-camera lights on these endo cams are insufficient imo so bring lights really close to mouth for highest quality capture / to reduce grain. You can also search for “pill camera”, but I’ve never used one.
Light underfoot shots: Throw a reflector on the floor and bounce more light off of it if needed. If that’s not enough, get a small light and diffuse it with a white cloth. (Could even be a white shirt) Or use an on-camera light with a diffuser or dim it down a lot as you only want to use it as a “fill” light.
Make the lighting even more beautiful: Add a hair light or light behind you so it can wrap around your body and create a beautiful glowing effect and give some separation between you and the background. Look up “three point lighting” if you don’t know about it.
Get more of your body in focus: Pump up the F stop to F8+, higher F stop = more in focus.
Blur the background: Here’s lots of things you can play around with depending on your equipment and studio – 1: shoot super close up to the lens (even cell phone videos can produce this effect if close enough) 2: set up the camera on a tripod and pretty far from you and zoom way in. Be careful about movement as you don’t want the camera to struggle with focus while zoomed way in. 3: try a macro lens for super close-ups 4: try a zoom lens for portraits or a 50mm+ and low F stop 5: Set the F stop to F1.8 or lower on whatever lens you’re using. (A lot will be out of focus in foreground and background) In all instances except extreme close-ups, the more depth to the background the better. So, avoid shooting straight on to a piece of furniture that’s against a plain wall if you really want to achieve this effect. Make the background interesting – add artwork, an artificial tree, string lights, etc- get creative with your space!
Better audio: Invest in a professional shotgun microphone for your camera (my cameras have had XLR connections and phantom power – you’d have to research for your own cam) Look up Adobe Audition tutorials on YouTube to reduce white noise and enhance audio. Also, reduce the noise you hear on set! Turn off the ac or heat and maybe even the fridge! Just remember to turn it back on – I put a dish towel around the fridge door handles to remind myself and have woken up pretty hot or cold from forgetting about the ac or heat being off!
Reduce grain: Use a low ISO setting. I don’t care if your camera can go up to ISO one million. (crying face) Limit the ISO for the highest quality video possible from your camera, especially considering that most of us are shooting in environments in which we are using professional light sets! I always shoot at a low ISO now days, set the F stop for the shot, crank my lights up, check the shot, and dim the lights as necessary. (The LEDs I recommended above are super bright and I use a lot of natural light as well) Honestly this is one of the reasons why my videos always appear to have high quality. I highly recommend doing ISO tests with your camera to see what you’d like to limit yours to because it will vary from camera to camera. Perhaps you don’t mind some grain? You may be comfortable with a higher ISO. Or you may find that a very low ISO is SUPER important for your particular camera and taste. I find that the cheaper/older/more basic a camera is the more important it is to keep the ISO super low — even as low as 100-200 in the case of getting clean GoPro shots at night or in a dark room for example.
Get realistic colors / spend less time color correcting/grading: Get your colors right from the start. If you’re using daylight/flourescenet/cool light then set your camera’s white balance to ~5,500k/outdoors. If you’re using indoor/tungsten/soft/warm light then set your camera’s white balance to ~3,500k/indoors. Make sure your lighting is all the same color temperature. So for example if you have a lot of daylight coming in then turn off indoor lamps unless you have daylight or color bulbs in them. If you’re shooting at night you can have indoor and ambient lights on if they’re warm. Just make sure to adjust the white balance in your camera depending on the lighting temperature around you and again match your light temps. This is so important. It will save you time in POST Production and gives you a higher quality video if you’re potentially butchering it less in POST. BTW some point-and-shoots, dslrs, camcorders, have even more color options in the menu for fine tuning your color before shooting. It’s worth checking out for sure!
Frame better shots: Look up “Rule of Thirds” if you don’t know about it.
Start a store: At Clips4Sale – this is how I started and I recommend them 100%!
♥ Favorite Beauty Products ♥
Lip gloss: Buxom’s Full-On Plumping Lip Cream
Foundation: MUFE’s Matte Velvet Skin Full Coverage Foundation
Highlighter: Benefit Cosmetics’ Cookie Highlighter
Brow pencil: Benefit Cosmetics’ Precisely, My Brow
Setting spray: Urban Decay’s All Nighter
Makeup remover: Clinique Take The Day Off
Face wash: Clinique Liquid Facial Soap
Night treatment: Olehenriksen Invigorating Night Transformation Gel I have more of their products as well and love them all
Body oil: I use a lot of oils- Almond Oil, Jojoba oil, and Argan oil are repetitive go-tos. I especially like applying it before shooting to give my body a glow when the light bounces off my skin.
Lotion: SheaMoisture African Black Soap Body Lotion
Exfoliating Scrub: Bath & Body Works Eucalyptus Spearmint Sugar Scrub
Lashes: Kiss Lash Couture Little Black Dress
Teeth whitening: Get professional whitening trays made at your dentist and whatever gel they recommend for you.
Lip filler: Voluma because it lasts the longest. Less injections! Just make sure you fully trust your injector.
Leggings: Express Sexy Stretch
Nail file: I switched to glass years ago and will never go back!
Foot Fetish Beauty Tip: If your big toenail curves in bit on the sides then carefully trim the excess with a cuticle trimmer to achieve a pretty toenail shape. Also try a gel pedicure at the nail salon! ♥
Favorite Misc Stuff
Portable Bluetooth Speaker: Sony SRS-XB32 (Nice bass!)
Coffee Maker: Keurig K-Cafe
Air Fryer: Cosori
Games: Overwatch, Twilight Princess, Unravel
Tv Shows: The Witcher, The Umbrella Academy, Messiah, Schitts Creek, Zumbo’s Just Deserts (Season 1), Taco Chronicals, Death Note (manga series only, not the movie), The Handmaid’s Tale, Orphan Black, Game of Thrones
YouTubers: Casey Neistat, Dan Mace, Peter McKinnon
Chill Mix: hi you’re cool, wanna get bubble tea?
Fun list for LA & SoCal Locals, Traveling Models, and Tourists
Beach: Santa Monica Pier and shopping at Santa Monica Place. Also right beside Venice Beach Boardwalk & close to Venice Canals.
Beauty Treatments: Beauty Park Medical Spa
Roller Coaster Ride: GhostRider at Knott’s Berry Farm OMG!!!
Dinner Show: Medieval Times
Event Destination: Fairplex
Donuts: Voodoo Donuts
Theater: AMC Dine-In
Amusement Parks: Universal Studios Hollywood, Disneyland
Rave: Hard Summer Music Festival (never been, but a relative loves)
Hike: Claremont Loop (medium-hard, dirt/mountain), Etiwanda Trail (medium, rocky, hilly), Mt. Rubidoux (easy since it’s paved)
Ice Cream: Creamistry
That wraps it up! The list above is true, pure, genuine. No company paid me to list anything. No links/purchases will benefit me in any way whatsoever. I just wanted to help aspiring producers, maybe show an established producer something cool, give a useful tip, inspire an idea, share favs with my readers and followers, and spread the love for Valentine’s Day. Hope you enjoyed.
Happy Valentine’s Day!
With much love and support to all,
Giantess Katelyn


How about using “insta360 GO” instead of the Endoscope Camera? It is small enough and performs well.
https://insta360.com/product/insta360-go/
A pretty interesting post and thank you for sharing all this information.
Being someone who isn’t in the industry and has only made some POV shots for fun —I’m using a 2-year-old Xiaomi cell phone with a great back camera… and a mediocre front one—, this makes me realize even more all the work behind this, because there’s a lot of research for these tools and also the learning curve and how you apply your knowledge. So seeing how well you know your tools really makes it clearer how much care and effort you put.
And those tips about lighting and how to improve shots might come handy, even with lesser tools, so nice you share those too.
And have a great month and, of course, a greater Valentine’s Day!
Katelyn, regarding the 1080 Ti, the reason the price has gone up is that it is a discontinued card.
Its replacement is the RTX 2080 Super at roughly the same price point.
The big advantage for people doing 3d animations is that it has native raytracing hardware onboard and is exponentially faster than the 10 series for that kind of work.
I have a 2080 Ti and it’s about 5x faster than my old 1080 was for Daz3d, Maya and 3dMAX raytracing.
Thanks for sharing this information Elrabin! It may be seriously helpful for your fellow digital artists! ♥
Hello Katelyn, and a really huge thank you for all your advices
I have some questions about shrunken props:
– Which scale do you prefer to use ?
– In your clips,you used to actually swallow some of them, but it looks like you stopped doing it in your last clips. Did something happened or is it just a choice (or am I wrong ^^” ) ?
– And last question, I remember a Twitter post where you told us you had swallowed a tiny in purpose to try to find him out the next day, so, did you found him back ?
Again thank you and I really hope to get an answer I wish you a very nice day
My pleasure Xerald! To answer your questions- 1) I personally like the 6″ and smaller scales because that’s the perfect size of a shrunken person imo! 2) I’ve never purposely swallowed figures in clips because they’re plastic lol! 3) That was a real shrunken man who wanted to be swallowed. Never found him or saw any remains. Either got completely absorbed by my body or flushed down the sewers. Or maybe he’s still in my stomach? I’ll never know!
Thank you for answering me Katelyn
 But I guess sometimes accidental swallow can happened
About the second point, that’s a good reason
On another topic, I’ve read your last blog post, and to answer, I think you’re making a good choice. I hope you’ll still produce videos, about any kind of fetishes you want, but most importantly I hope that it’ll make feeling you better and happy. You talk about your husband, that you’re lucky to have him, and don’t forget he’s happy to have you as well And all of us are lucky to follow you for years !